

All My Marbles - A pastel tutorial
Working with glass, reflections and highlights.
Here's a new pastel tutorial and WIP for you. I'm calling the piece All My Marbles. I have some 1950s vintage cat's eye marbles that I photographed outside. I put them in a cut glass votive candle holder and with the cloudy day it made for some interesting reflections that I hope to develop.
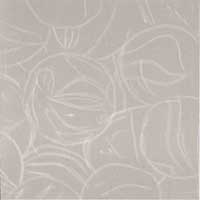
In this first WIP I've transferred a rough outline sketch of each marble on to the 6"x 6" gray velour paper. To do this, I placed my reference photo on my light box and place the velour paper directly over the photo to sketch the outlines using a white Conte stick. I've made sure to put in the cat's eyes and a few of the major reflections for reference points.
Preparation
I don't put a whole lot of detail into my initial sketches. This encourages me to use my drawing skills, to draw what I see, and also allows me to be a bit creative too - not copying every detail of the photograph but instead using it as a guide.
Making a start
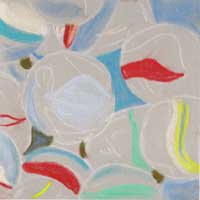
Next, using my photo reference, I've blocked in the solid colors of the cat's eyes on each marble using Rembrandt soft pastels.
Now I've started drawing in the glass colors, reflections and bubbles in the marbles. My favorite one so far is the upper right marble. I like the green bottle glass look of it and the reflections too.

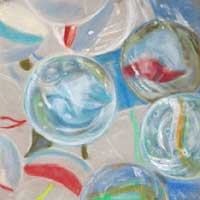
In this WIP, I can see that I need to work on the roundness of the middle marble but I can fix that later. With pastels you can layer your color over the top of another color without worrying about "mixing" colors like you would with wet paint. The amount of pressure you put on the pastel determines if the color you are laying down will be a light glaze or a solid color. At some point the velour may not take any more color because the "tooth" will be full. I would rather not get to that point though - it's always nice to have a little room to play around with the color.
I've continued to work on describing more marbles and refining those I have already drawn. Getting the marbles to look round and have depth is extremely important. The marble on right side, near the bottom was looking rather flat to me - it is the one with all the bubbles in the glass. I think it has a more rounded appearance now and that was done by just redirecting some color and lines. Did you notice you can see the bottom of the cut glass votive reflecting all the colors in the marbles too?
Here I have put two of the most recent WIPs side-by-side making it easier to compare exactly what I have done. You can see how the marbles are taking form with color, lights and darks. Not every reflection or highlight was made by white. I've used light blues, greens and grays and then next to those highlights I've placed darker colors to make the highlights pop. It is amazing to me how little globes of glass with streaks of color and bubbles, that seem to be frozen in place, can be so beautiful.
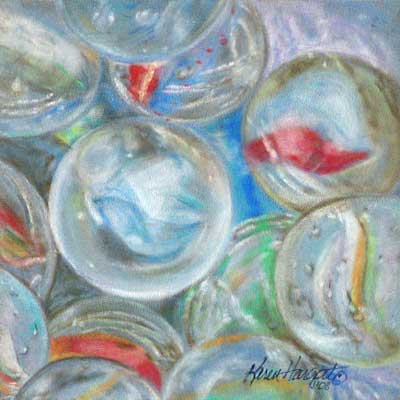
All My Marbles - is finished! Well pretty near anyway. I will set it aside for the next day or two, as is my custom, and see if anything needs to be fixed. I have already seen a few edges of the marbles that I need to "round" out but I'm thinking it will take very little to correct things.
It has been a whole lot of fun to try to get the glass look of each marble and all the reflections bouncing off of each marble. There is a lot going on in this little pastel - bigger wouldn't have made it better.
I hope this study in glass, reflections and highlights will help you with your next drawing. Remember that the things learned in this pastel will help you in drawing many other things besides glass - like eyes, water, round objects, mirrors and other shiny surfaces.
© Karen Hargett 2008
If you wish to use any of my artwork please e-mail me for written permission