

Red, White & Silver - A pastel tutorial
Working with reflections, shadows and folded material
Although I didn't scan each step I took with this drawing of Red, White & Silver from the beginning I did scan after having a couple of hours of work on it. I just got too involved in the drawing I couldn't stop but I think I can bring you up to speed.
This drawing is about 10"x 8" on sand colored velour. I've used mostly Rembrandt soft pastels and just a few hard Conté pastels.
Preparation
The first thing I did after selecting my photo reference was to transfer it to my velour paper using a light box. My outline sketch was pretty rough - just to get placement of everything down on the paper and not worrying too much about the details. There is no right or wrong way to do this step, freehand, grid or transferring all work well. You can add the details or not at this point - it is totally up to you. I do recommend that you practice drawing freehand as much as possible - good drawing skills are a very important and I try to draw something every day.
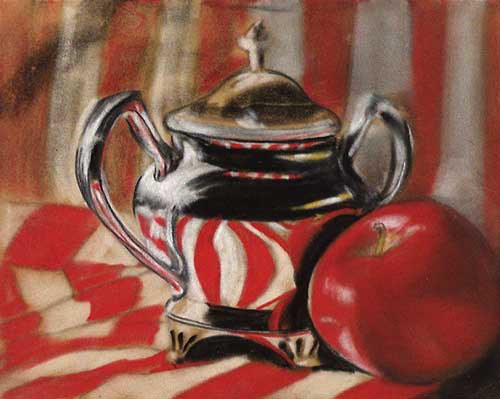
Making a start
After I had my rough sketch I began laying in the red and white with the soft Rembrandt pastel sticks. You can see how I did that on the unfinished parts on the left hand side. It is just basically blocking in colors and not worrying about the details - yet. After the reds and whites were down I started adding the blacks on the silver sugar bowl and then went back with whites and a light blue and gray to add highlights. Rembrandt has a wonderfully rich black is really dark. The Conté black just doesn't get that deep, rich, black that I need sometimes, however the Conté does come in real handy when doing light washes of black, outlines or when coverage isn't an issue.
I don't do much blending at all with my fingers. I just layer color over color until I achieve the look I'm going for by using varying amounts of pressure. Occasionally, I'll just press my finger on a spot of color without rubbing. This will make the color a little dull by pressing it down in the tooth of the paper. Sometimes it is just trial and error - I find pastels pretty forgiving.
On the apple I used red, orange, a bit of yellow and green, some brown and then added whites and blues for the highlights. After that, to get the shadowing on the apple, I did a wash of brown and black with a light pressure using the Conté sticks. It has probably about 8 to 10 layers of pastel on it if I were to guess.
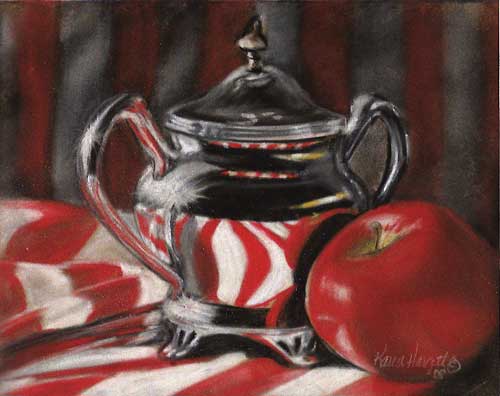
Additional layers
Most of what has been done was to refine those areas that were almost finished by adding more layers and making sure the edges looked as they should. I added a wash of brown and black with the Conté pastel sticks over the background and in the areas of shadows on the flag in the foreground. I've added some black into the deep recesses of the fold of the flag giving it depth and added different shades of red and some white to the tops of the red stripes to describe the light playing off the folds of material. I've darkened the shadows under the sugar bowl, apple and down the right side of the drawing putting it more in shadow.
Finishing touches
To finish the drawing I have refined the details, making the darks darker and the highlights more prominent by going back with a bit of white, blue, yellow, green and red in the appropriate spots. You will be surprised what just a dot of color can do in the right spot.
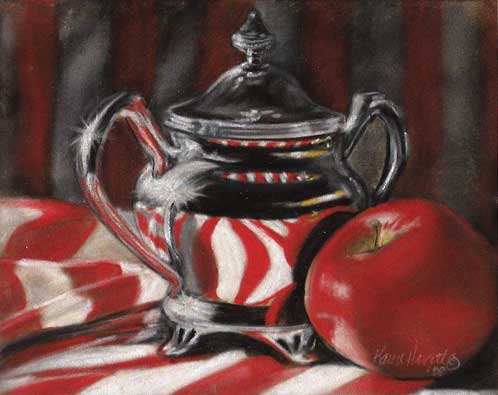
I hope when you do your next pastel you will be able to apply some of the elements of this drawing when dealing with reflective light, shadows and highlights, folds of fabric, and the reflections of an object in metal. You will find these elements not only in still life but in landscapes as well. I can imagine a landscape of rolling hills mimicking the folded elements of the flag, or curtains as you look through a window pane that is reflecting the landscape behind you with a place setting of some sort on the table inside - could be an interesting drawing.
© Karen Hargett 2008
If you wish to use any of my artwork please e-mail me for written permission